
Organizing your model
Names, tags, visibility toggles, and the Outliner keep a growing model legible and searchable.
Once a model outgrows a dozen objects, you stop finding things by orbiting around looking for them. The right-hand tray is the answer: the Outliner shows everything, Object Info names and tags the selected thing, and Tags toggles whole categories on and off.
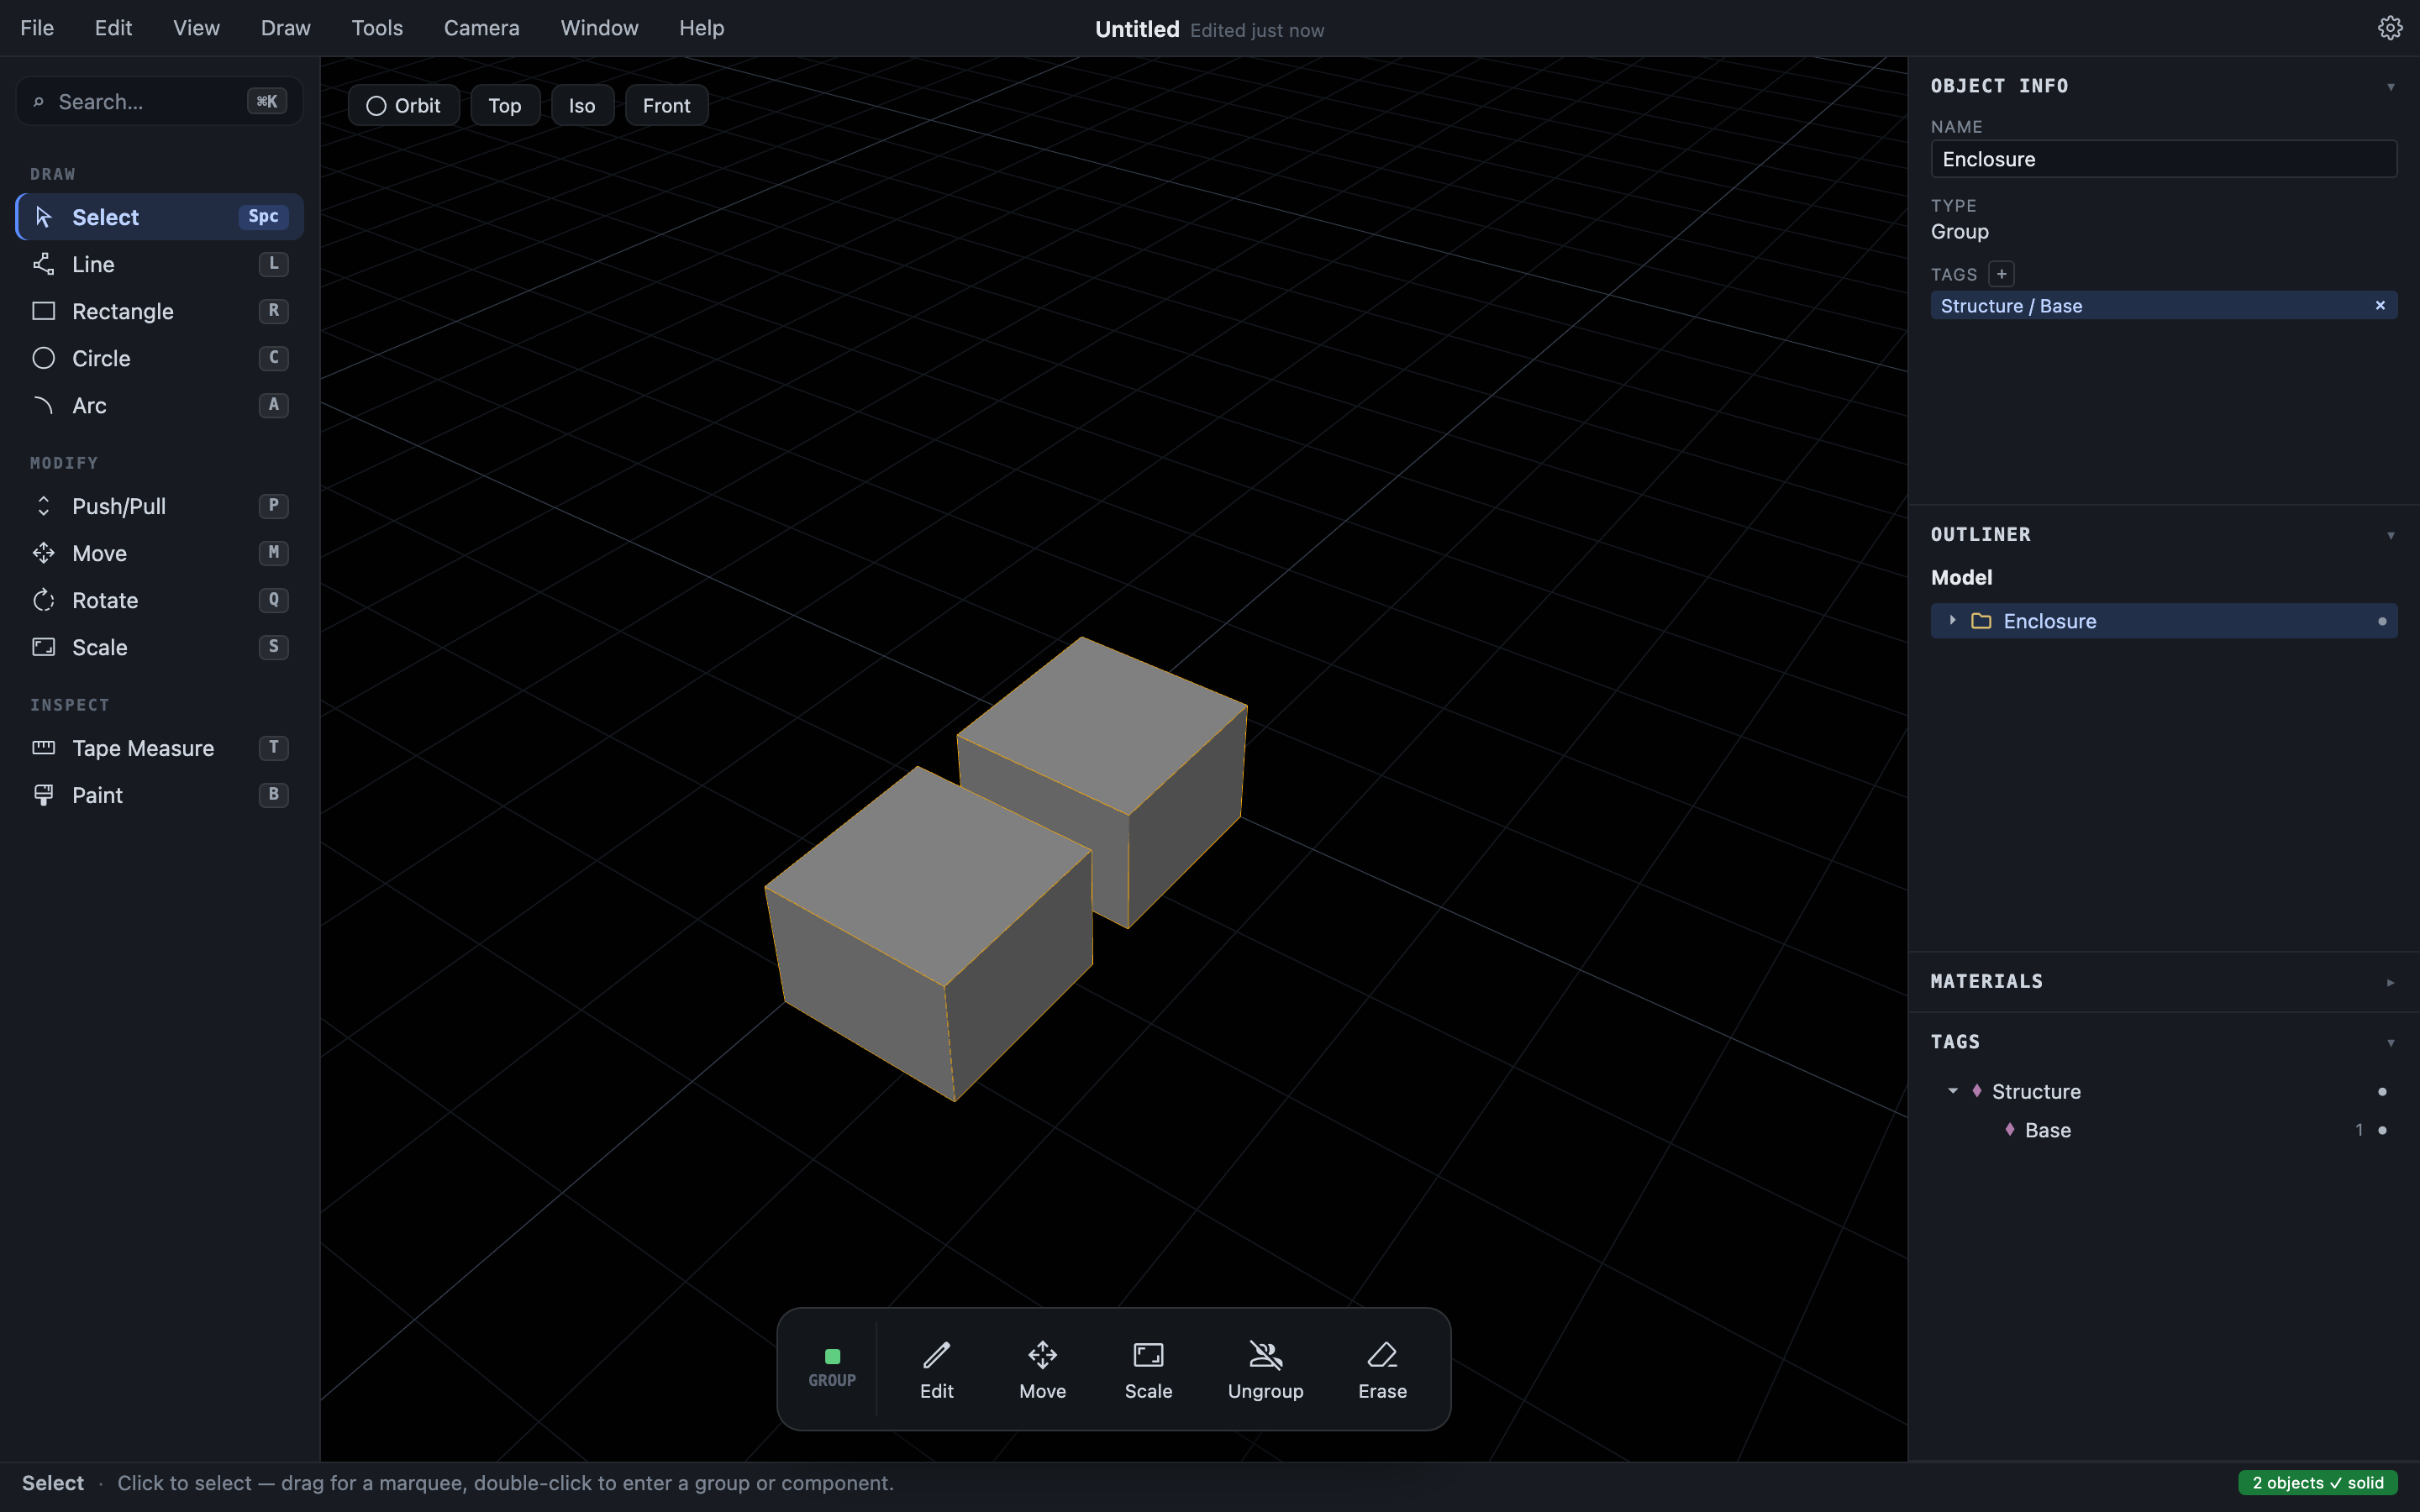
The Outliner
The Outliner (Window ▸ Model Info, ⇧⌘I / Ctrl+Shift+I) lists the document tree: every object, group (expandable), component instance, and free-standing sketch.
- Click a row to select it,
Shift/⌘/Ctrl-click for multi-select. - Double-click a row to enter that item’s editing context, exactly like double-clicking it in the viewport. The breadcrumb at the top shows your current context and steps you back out.
- The dot at the row’s right edge toggles visibility: ● shown, ○ hidden. Hiding a group hides everything inside it.
- Icons carry meaning: a cube is an object (drawn with a dashed outline if the object is leaky), a folder is a group, a hexagon is a component instance, a pen curve is a sketch.
Object Info: names and tags
Object Info (Window ▸ Object Info, ⇧⌘O / Ctrl+Shift+O) shows the single selected item:
- Name: type a new one and press
Enter. Clear the field to fall back to the automatic label (“Object 1”, “Group 2”, …). Sketches can’t be renamed. - Type: Object, Group, Component, or Sketch.
- Geometry, for objects: Solid (green) or Leaky (red). Core concepts explains why this matters.
- Tags: the item’s tag chips. Click + to add a tag; click a chip’s × to remove it.
With several things selected, Object Info shows just the count; select one item to edit its details.
Tags
Tags are labels for slicing a model into toggleable categories — Structure, Hardware, Reference, whatever fits your project. Unlike groups, tags don’t affect the model tree; an object can carry any number of tags no matter where it lives.
- Add a tag in Object Info with the + button. Use
/to nest: typingStructure/Roofcreates (or reuses) a Structure parent with a Roof child. - The Tags panel (Window ▸ Tags,
⇧⌘T/Ctrl+Shift+T) shows the resulting tree, with a count of tagged items on each row and an eye toggle that hides everything tagged at or under that path. - Tag visibility composes with Outliner visibility — an item hidden by either stays hidden until both show it again.
- Tags import from SketchUp files, so a tagged SketchUp model arrives pre-organized. They’re saved in your
.hewfile and searchable in the command palette.
Practical conventions
- Name objects as soon as a model has more than a few — future you (and the command palette, which searches model names) will thank you.
- Prefer groups for things that move together, tags for things that show/hide together, and components for repeated parts (Groups and components).
- The watertightness badge in the status bar tells you whether something is leaky; the Outliner’s dashed icons and Object Info tell you what.